Guides:How to make an Incremental Game
Note: This guide is a work in progress, and is missing supporting images and several subsections.
Incremental games are a favorite genre of Castle creators. They're easy to build and offer a great canvas for creativity. They can also feature leaderboards where your friends or other castle users can compete for the highest scores!
In this guide, we'll cover the basic steps for creating an incremental game, how you can make one yourself, and what you might change and customize to make your game unique!
Making a button
The first and most basic element of almost every incremental game is something you can press to get points! Some incremental games feature several pressable items, while others give you just one big button, cookie, or other clickable. You can even go as far as having your pressable items move about or disappear only to reappear later after being pressed, but you should be careful not to break the flow for your tapping players, who'll get really immersed if they can just tap tap away.
Make sure you've navigated to the create screen and started a new empty deck. Then, let's create a new blueprint by tapping the + sign on the belt. The belt is where all of your blueprints will be organized, it's the white strip at the bottom of the editor. Select "empty blueprint" from the list of blueprint options.
Open up our new empty blueprint by tapping on it in the belt and selecting "edit". The inspector will open to show us the insides of this new blueprint. We can now begin filling it with the art and logic that will make our button what it is. We'll start with the art.
Button artwork
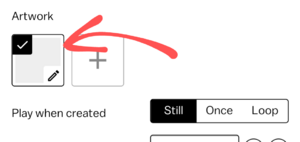
To add artwork to our button, lets navigate to the art tool by selecting the empty art frame in the inspector.
Once we're in the art tool, we can draw our button. If you have another idea about what you'd like the players to tap, like a cookie, a cheese curd, a dollar bill or an egg-laying chicken, you can draw that instead!
Also make sure that there's a "Pressed" state of the artwork, which you can create by pressing the 'Add' button to create a new frame, and then drawing a pressed version of your art.
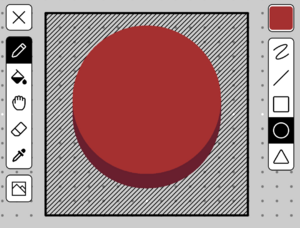
Here's what we drew:
Great, if we're satisfied with our art, let's leave the art tool with the [X] button on the top left. Next, let's give this blueprint logic that makes it work as a button.
Collecting taps
Now we can begin working on getting our button to collect resource satisfyingly, with animations and sounds! For a button to work correctly, we'll need two things. One, we need it to animate in some way to indicate that it's been pressed, and two, we need the press to have some effect on the game.
Animating the button
We'll add two new rules, with the trigger "when a touch begins on this" and "when a touch ends on this". Next, we'll modify the current frame of the actor to either 1 or 2 based on whether it's currently touched or not. That looks like this:
When a touch begins on this: modify behavior property Current Frame to 2
When a touch ends on this: modify behavior property Current frame to 1
The button will animate when pressed now! You can test it by dragging the button into the scene, scaling it with the scale and rotate mode, and then pressing the play button.
Making the button effect the score
With the animation done, let's make our button have an effect on the game when tapped. In our case, the effect we want it to have is to increase a number. Navigate to your "Logic" tab and add a new rule with the "when this is tapped" trigger:
When this is tapped: modify the value of the variable $score to 1 (relative)
When making this rule, you'll be creating a new variable named 'score', which you can also rename to whatever you want based on your game's theme. If your game is about collecting eggs, it can be named "eggs". You might also choose to add a "Play a sound" response below the "Modify the value of a variable" response and change the sound effect to your liking from the sound effect picker.
The other thing we should do is display our new `$score` variable with some text. Let's add a new blueprint, selecting the "Text" option from the Add Blueprint menu. Change the text content to "$score" (or whatever name you chose for your score variable), by opening the blueprint in the inspector and tapping on the text field.
Now that we have both our button and score display text, we can see what they do! Drag both your new Button and your Text blueprints into the scene to create new actors based on the blueprints. Scale them to whatever size you prefer with the scale and rotate mode and then press play to try them out.

